Ddfairchildd (talk | contribs) (→Technology Blueprints: remove advertising) |
Ddfairchildd (talk | contribs) (→Quality: use wiki plurals) |
||
| (12 intermediate revisions by 3 users not shown) | |||
| Line 1: | Line 1: | ||
| − | {{Version| |
+ | {{Version|Origins}} |
{{Product infobox |
{{Product infobox |
||
| image = MAINTTECH.FUEL2.png |
| image = MAINTTECH.FUEL2.png |
||
| Line 5: | Line 5: | ||
| color = depends on class |
| color = depends on class |
||
| type = Moderate (C) <br> Significant (B) <br> Powerful (A) <br> Supreme (S)<br> Suspicious (X) <br> Upgrade |
| type = Moderate (C) <br> Significant (B) <br> Powerful (A) <br> Supreme (S)<br> Suspicious (X) <br> Upgrade |
||
| − | | release = |
+ | | release = Origins |
}} |
}} |
||
'''Upgrade Modules''' are consumable products. These are important additions to base technologies and enhance them. |
'''Upgrade Modules''' are consumable products. These are important additions to base technologies and enhance them. |
||
== Summary == |
== Summary == |
||
| − | '''Upgrade Modules''' can greatly improve properties of the installed [[Technology|technologies]] in your [[exosuit]], [[multi-tool]], or [[starship]]. These can be bought with [[Nanite Clusters|nanites]] from [[Technology Merchant|technology merchants]] in [[space station]]s. Unwanted modules obtained from other sources ([[Damaged Machinery]], [[Operations Centre]]s, [[Crashed Ship]]s, and so on) can be sold to these merchants for nanites to spend on more desirable modules. The prices vary between locations and it can be wise to buy an S-class module in a system offering a cheap supply due to its random property. At 400 nanite cost, 5% can mean around 20. |
+ | '''Upgrade Modules''' can greatly improve properties of the installed [[Technology|technologies]] in your [[exosuit]], [[exocraft]], [[multi-tool]], or [[starship]]. These can be bought with [[Nanite Clusters|nanites]] from [[Technology Merchant|technology merchants]] in [[space station]]s. Unwanted modules obtained from other sources ([[Damaged Machinery]], [[Operations Centre]]s, [[Crashed Ship]]s, and so on) can be sold to these merchants for nanites to spend on more desirable modules. The prices vary between locations and it can be wise to buy an S-class module in a system offering a cheap supply due to its random property. At 400 nanite cost, 5% can mean around 20. |
You will never be able to install all existing modules at the same time. Choose the ones that suit your play style and feel like the most fun for your character. With the right modules, you can be any combination of fast, resilient, and powerful. Technologies do not count as a module and their limit and thus can be used in combination with them. |
You will never be able to install all existing modules at the same time. Choose the ones that suit your play style and feel like the most fun for your character. With the right modules, you can be any combination of fast, resilient, and powerful. Technologies do not count as a module and their limit and thus can be used in combination with them. |
||
| Line 28: | Line 28: | ||
== Quality == |
== Quality == |
||
| − | Each module exists in the |
+ | Each module exists in the standard class order, '''C''' < '''B''' < '''A''' < '''S'''. (Only [[Suspicious Module]]s inherit the black-market '''X''' class.) |
*C-class modules, valued at ~65 nanites, often contain upgrades with bad stats. For module types with at least four possible stats, upgrades from these modules will usually have one stat. |
*C-class modules, valued at ~65 nanites, often contain upgrades with bad stats. For module types with at least four possible stats, upgrades from these modules will usually have one stat. |
||
*B-class modules, valued at ~150 nanites, often contain upgrades with mediocre stats. For module types with at least four possible stats, upgrades from these modules will usually have two stats. |
*B-class modules, valued at ~150 nanites, often contain upgrades with mediocre stats. For module types with at least four possible stats, upgrades from these modules will usually have two stats. |
||
| Line 34: | Line 34: | ||
*S-class modules, valued at ~500 nanites, often contain upgrades with very good stats. For module types with at least four possible stats, upgrades from these modules will usually have four stats. |
*S-class modules, valued at ~500 nanites, often contain upgrades with very good stats. For module types with at least four possible stats, upgrades from these modules will usually have four stats. |
||
| − | Technology merchants always sell C-class (or B-class, for Exosuit module types lacking a C-class quality) modules for each module type. They also stock a random assortment of higher-class upgrade modules which varies between [[star system]]s. |
+ | Technology merchants always sell C-class (or B-class, for Exosuit/Exocraft module types lacking a C-class quality) modules for each module type. They also stock a random assortment of higher-class standard upgrade modules which varies between [[star system]]s. |
If the player is unlucky, their new A-class module can be worse than their old C-class module, especially for those having only one stat (Starship Shield etc.) due to the low % ranges overlapping the top-tier of lower classes. |
If the player is unlucky, their new A-class module can be worse than their old C-class module, especially for those having only one stat (Starship Shield etc.) due to the low % ranges overlapping the top-tier of lower classes. |
||
| Line 50: | Line 50: | ||
When you buy a high-grade module, create a restore point (e.g. get in and out of your starship), then install the module. If it is worse than your bonus target (see bonus stats on the module family pages), reload the game and buy a cheap C-class module. Install it and dismantle it immediately. Your module pool now is rerolled and the former useless item might be useful now. Then repeat the above procedure until you get module stats you are happy with. This way you can prevent wasting huge amounts of nanites by sacrificing low grade modules. Just remember that the module order is static, so reloading to change it won't work. The installation order has to be mixed up. |
When you buy a high-grade module, create a restore point (e.g. get in and out of your starship), then install the module. If it is worse than your bonus target (see bonus stats on the module family pages), reload the game and buy a cheap C-class module. Install it and dismantle it immediately. Your module pool now is rerolled and the former useless item might be useful now. Then repeat the above procedure until you get module stats you are happy with. This way you can prevent wasting huge amounts of nanites by sacrificing low grade modules. Just remember that the module order is static, so reloading to change it won't work. The installation order has to be mixed up. |
||
| − | == |
+ | ==Technology Blueprint & Upgrade Module== |
| + | Technology blueprints and upgrade modules are documented on each technology specific page as follows. |
||
| − | ===[[Exosuit]] Modules=== |
||
| + | {|class="wikitable" |
||
| − | |||
| − | + | ! Technology !! Section |
|
| − | {| class="wikitable" |
||
| − | ! |
||
| − | ! |
||
| − | !Technology / Upgrade |
||
| − | !Effect |
||
|- |
|- |
||
| + | | Exosuit || {{see|Exosuit#Technology_Upgrades}} |
||
| − | |style="background:#3399ff;border:none" rowspan="2" | |
||
| − | |rowspan="2" | <br><br> |
||
| − | [[File:CLASS.C.png|30px|link=]] |
||
| − | |{{ilink|Life Support}} |
||
| − | |Keeps the player alive and provides power for movement |
||
|- |
|- |
||
| + | | Starship || {{see|Starship#Upgrading_Starship_Technology}} |
||
| − | |{{ilink|Oxygen Recycler}} |
||
| − | |Increases life support capacity by 10% |
||
|- |
|- |
||
| + | | Living Ship || {{see|Starship#Upgrading_Living_Ship_Technology}} |
||
| − | | |
||
| − | |[[File:CLASS.A.png|30px|link=]] |
||
| − | |{{ilink|Oxygen Rerouter}} |
||
| − | |Uses Life Support system as an emergency oxygen supply |
||
|- |
|- |
||
| + | | Multi-Tool || {{see|Multi-tool}} |
||
| − | |style="background:#c9d0e4;border:none" rowspan="7" | |
||
| − | |rowspan="7" | <br> |
||
| − | [[File:CLASS.B.png|30px|link=]] <br>[[File:CLASS.B.png|30px|link=]]<br>[[File:CLASS.C.png|30px|link=]] <br>[[File:CLASS.C.png|30px|link=]]<br>[[File:CLASS.C.png|30px|link=]]<br>[[File:CLASS.C.png|30px|link=]]<br> |
||
| − | |{{ilink|Hazard Protection}} |
||
| − | |Protects from extreme temperatures, radiation & toxicity |
||
|- |
|- |
||
| + | | Exocraft || {{see|Exocraft}} {{see|Minotaur}} {{see|Nautilon}} |
||
| − | |{{ilink|Shield Lattice}} |
||
| − | |Increases Hazard Protection's protection duration |
||
|- |
|- |
||
| + | | Freighter || {{see|Freighter}} |
||
| − | |{{ilink|Aeration Membrane}} |
||
| − | | +34% Underwater Breathing Efficiency |
||
|- |
|- |
||
| − | |{{ilink|Toxin Suppressor}} |
||
| − | |Supplements Hazard Protection in toxic environments |
||
| − | |- |
||
| − | |{{ilink|Radiation Deflector}} |
||
| − | |Supplements Hazard Protection in radioactive environments |
||
| − | |- |
||
| − | |{{ilink|Thermic Layer}} |
||
| − | |Supplements Hazard Protection in cold environments |
||
| − | |- |
||
| − | |{{ilink|Coolant Network}} |
||
| − | |Supplements Hazard Protection in hot environments |
||
| − | |- |
||
| − | |style="background:#ffcc00;border:none" rowspan="5" | |
||
| − | |rowspan="5" | <br><br> |
||
| − | [[File:CLASS.S.png|30px|link=]] |
||
| − | |||
| − | [[File:CLASS.A.png|30px|link=]] |
||
| − | |||
| − | [[File:CLASS.A.png|30px|link=]] |
||
| − | |||
| − | [[File:CLASS.B.png|30px|link=]] |
||
| − | |{{ilink|Jetpack}} |
||
| − | |Allows a player to temporarily fly |
||
| − | |- |
||
| − | |{{ilink|Airburst Engine}} |
||
| − | |Allows a player to recharge exosuit jetpack while airborne |
||
| − | |- |
||
| − | |{{ilink|Rocket Boots}} |
||
| − | |Enables advanced Jetpack functionality |
||
| − | |- |
||
| − | |{{ilink|Efficient Water Jets}} |
||
| − | |Uses jetpack for faster underwater travel than swimming |
||
| − | |- |
||
| − | |{{ilink|Neural Stimulator}} |
||
| − | |Increases running distance and Jetpack flight time |
||
| − | |- |
||
| − | |style="background:#ffffff;border:none" rowspan="4" | |
||
| − | |rowspan="4" |[[File:CLASS.S.png|30px|link=]] |
||
| − | [[File:CLASS.A.png|30px|link=]] |
||
| − | |||
| − | [[File:CLASS.B.png|30px|link=]] |
||
| − | |||
| − | [[File:CLASS.C.png|30px|link=]] |
||
| − | |{{ilink|Advanced Translator}} |
||
| − | |Temporarily translates 3 words in each interaction |
||
| − | |- |
||
| − | |{{ilink|Superior Translator}} |
||
| − | |Temporarily translates 2 words in each interaction |
||
| − | |- |
||
| − | |{{ilink|Simple Translator}} |
||
| − | |Temporarily translates 1 word in each interaction |
||
| − | |- |
||
| − | |{{ilink|Artemis' Translator|Artemis Translator}} |
||
| − | |1 word in each interaction created during the Artemis Path |
||
| − | |- |
||
| − | | |
||
| − | | |
||
| − | |{{ilink|Haz-Mat Gauntlet}} |
||
| − | |Required to harvest some substances, e.g. flowers |
||
| − | |- |
||
| − | | |
||
| − | | |
||
| − | |{{ilink|Personal Refiner}} |
||
| − | |Single item refiner that you carry with you at all times |
||
| − | |- |
||
| − | |style="background:#ffffff;border:none" rowspan="3" | |
||
| − | |rowspan="3" | |
||
| − | |{{ilink|Star Seed}} |
||
| − | |Reward for finishing the Atlas Path. Grants a boost to health |
||
| − | |- |
||
| − | | rowspan="2" |{{ilink|Remembrance}} |
||
| − | |Reward for finishing the Artemis Path. |
||
| − | |- |
||
| − | |Grants a boost to health & grants access to Remembrance Terminals |
||
| − | |} |
||
| − | |||
| − | ==== Upgrade Modules ==== |
||
| − | {| class="wikitable" |
||
| − | ! rowspan="2" | |
||
| − | ! rowspan="2" |Module |
||
| − | Name |
||
| − | ! rowspan="2" |Stats |
||
| − | Drawn |
||
| − | ! rowspan="2" |''Module'' |
||
| − | ''Improves'' |
||
| − | ! colspan="2" |[[File:CLASS.C.png|30px|link=]] |
||
| − | ! colspan="2" |[[File:CLASS.B.png|30px|link=]] |
||
| − | ! colspan="2" |[[File:CLASS.A.png|30px|link=]] |
||
| − | ! colspan="2" |[[File:CLASS.S.png|30px|link=]] |
||
| − | ! colspan="2" |X-Class |
||
| − | |- |
||
| − | !Min |
||
| − | !Max |
||
| − | !Min |
||
| − | !Max |
||
| − | !Min |
||
| − | !Max |
||
| − | !Min |
||
| − | !Max |
||
| − | !Min |
||
| − | !Max |
||
| − | |- |
||
| − | |style="background:#3399ff;border:none" rowspan="2" | |
||
| − | | rowspan="2" |{{ilink|Life Support Upgrade|Life Support|}} |
||
| − | | rowspan="2" |B 1-2 |
||
| − | A/S 2 |
||
| − | |||
| − | X 1-2 |
||
| − | |''Life Support Tanks'' |
||
| − | | colspan="2" rowspan="2" |n/a |
||
| − | |5 |
||
| − | |20 |
||
| − | |20 |
||
| − | |50 |
||
| − | |50 |
||
| − | |100 |
||
| − | |5 |
||
| − | |110 |
||
| − | |- |
||
| − | |''Solar Panel Power'' |
||
| − | |0 |
||
| − | |10 |
||
| − | |0 |
||
| − | |25 |
||
| − | |25 |
||
| − | |50 |
||
| − | |0 |
||
| − | |75 |
||
| − | |- |
||
| − | |style="background:#ffcc00;border:none" rowspan="6" | |
||
| − | | rowspan="6" |{{ilink|Movement System Upgrade|Movement}} |
||
| − | | rowspan="2" |Always |
||
| − | |''Jetpack Tanks'' |
||
| − | |100 |
||
| − | |150 |
||
| − | |100 |
||
| − | |150 |
||
| − | |150 |
||
| − | |200 |
||
| − | |200 |
||
| − | |225 |
||
| − | |100 |
||
| − | |230 |
||
| − | |- |
||
| − | |''Initial Boost Power'' |
||
| − | | colspan="2" |n/a |
||
| − | |0 |
||
| − | |5 |
||
| − | |0 |
||
| − | |5 |
||
| − | |5 |
||
| − | |10 |
||
| − | |0 |
||
| − | |15 |
||
| − | |- |
||
| − | | rowspan="4" |C 0-1 |
||
| − | B 0-2 |
||
| − | |||
| − | A 1-2 |
||
| − | |||
| − | S 2 |
||
| − | |||
| − | X 0-2 |
||
| − | |''Fuel Efficiency'' |
||
| − | |5 |
||
| − | |10 |
||
| − | |10 |
||
| − | |15 |
||
| − | |10 |
||
| − | |20 |
||
| − | |10 |
||
| − | |20 |
||
| − | |5 |
||
| − | |25 |
||
| − | |- |
||
| − | |''Sprint Recovery Time'' |
||
| − | |0 |
||
| − | |10 |
||
| − | |10 |
||
| − | |20 |
||
| − | |20 |
||
| − | |30 |
||
| − | |30 |
||
| − | |50 |
||
| − | |0 |
||
| − | |60 |
||
| − | |- |
||
| − | |''Recharge Rate'' |
||
| − | |0 |
||
| − | |5 |
||
| − | |5 |
||
| − | |10 |
||
| − | |10 |
||
| − | |15 |
||
| − | |15 |
||
| − | |25 |
||
| − | |5 |
||
| − | |30 |
||
| − | |- |
||
| − | |''Sprint Distance'' |
||
| − | |10 |
||
| − | |20 |
||
| − | |10 |
||
| − | |30 |
||
| − | |20 |
||
| − | |50 |
||
| − | |40 |
||
| − | |50 |
||
| − | |10 |
||
| − | |60 |
||
| − | |- |
||
| − | |style="background:#ffffff;border:none" rowspan="2" | |
||
| − | | rowspan="2" |{{ilink|Defence Systems Upgrade|Defence Systems}} |
||
| − | | rowspan="2" |C/B 1-2 |
||
| − | A/S 2 |
||
| − | |||
| − | x 1-2 |
||
| − | |''Core Health'' |
||
| − | | colspan="10" |20 (shows as 33) |
||
| − | |- |
||
| − | |''Shield Strength'' |
||
| − | |80 |
||
| − | |90 |
||
| − | |80 |
||
| − | |90 |
||
| − | |85 |
||
| − | |90 |
||
| − | |90 |
||
| − | |95 |
||
| − | |75 |
||
| − | |95 |
||
| − | |- |
||
| − | |style="background:#c9d0e4;border:none" rowspan="5" | |
||
| − | |{{ilink|Toxin Suppressor| }}Toxic Protection |
||
| − | |Always |
||
| − | |''Toxic Protection'' |
||
| − | | colspan="2" |n/a |
||
| − | |180 |
||
| − | |265 |
||
| − | |200 |
||
| − | |265 |
||
| − | |220 |
||
| − | |265 |
||
| − | | rowspan="4" |1 |
||
| − | 1 |
||
| − | |||
| − | 1 |
||
| − | |||
| − | 1 |
||
| − | | rowspan="4" |10 |
||
| − | 10 |
||
| − | |||
| − | 10 |
||
| − | |||
| − | 10 |
||
| − | |- |
||
| − | |{{ilink|Radiation Deflector| }}Radiation Protection |
||
| − | |Always |
||
| − | |''Radiation Protection'' |
||
| − | | colspan="2" |n/a |
||
| − | |180 |
||
| − | |265 |
||
| − | |200 |
||
| − | |265 |
||
| − | |220 |
||
| − | |265 |
||
| − | |- |
||
| − | |{{ilink|Coolant Network| }}Heat Protection |
||
| − | | rowspan="3" |Stats |
||
| − | show |
||
| − | |||
| − | wrong |
||
| − | |''Heat Protection'' |
||
| − | | colspan="2" |n/a |
||
| − | |180 |
||
| − | |265 |
||
| − | |200 |
||
| − | |265 |
||
| − | |220 |
||
| − | |265 |
||
| − | |- |
||
| − | |{{ilink|Thermic Layer| }}Cold Protection |
||
| − | |''Cold Protection'' |
||
| − | | colspan="2" |n/a |
||
| − | |180 |
||
| − | |265 |
||
| − | |200 |
||
| − | |265 |
||
| − | |220 |
||
| − | |265 |
||
| − | |- |
||
| − | |{{ilink|Aeration Membrane| }}Underwater Protection |
||
| − | |''Oxygen Tank'' |
||
| − | | colspan="2" |n/a |
||
| − | |180 |
||
| − | |265 |
||
| − | |200 |
||
| − | |265 |
||
| − | |220 |
||
| − | |265 |
||
| − | |n/a |
||
| − | |n/a |
||
| − | |} |
||
| − | Please add new modules directly to {{link|Life Support Upgrade}}; {{link|Movement System Upgrade}}; {{link|Defence Systems Upgrade}}. |
||
| − | |||
| − | === [[Starship]] Modules === |
||
| − | |||
| − | |||
| − | ==== Technology Blueprints ==== |
||
| − | {| class="wikitable" |
||
| − | |- |
||
| − | ! |
||
| − | !Technology / Upgrade |
||
| − | !Effect |
||
| − | |- |
||
| − | |style="background:#3399ff;border:none" rowspan="3" | <br><br> |
||
| − | [[File:CLASS.S.png|30px|link=]] |
||
| − | |||
| − | [[File:CLASS.B.png|30px|link=]] |
||
| − | |{{ilink|Launch Thruster|Launch Thruster}} |
||
| − | |Required for landing and lift-off |
||
| − | |- |
||
| − | |{{ilink|Launch System Recharger|Launch System Recharger}} |
||
| − | |Recharges LT at 4% per minute |
||
| − | |- |
||
| − | |{{ilink|Efficient Thrusters|Efficient Thrusters}} |
||
| − | |Launch cost -20% |
||
| − | |- |
||
| − | |style="background:#f18700;border:none" rowspan="4" | <br><br> |
||
| − | [[File:CLASS.S.png|30px|link=]] |
||
| − | |||
| − | [[File:CLASS.A.png|30px|link=]] |
||
| − | |||
| − | [[File:CLASS.A.png|30px|link=]] |
||
| − | |{{ilink|Pulse Engine|Pulse Engine}} |
||
| − | |Powers all in-system flight |
||
| − | |- |
||
| − | |{{ilink|Sub-Light Amplifier|Sub-Light Amplifier}} |
||
| − | |Increases pulse engine speed |
||
| − | |- |
||
| − | |{{ilink|Instability Drive|Instability Drive}} |
||
| − | |Increases fuel efficiency |
||
| − | |- |
||
| − | |{{ilink|Photonix Core|Photonix Core}} |
||
| − | | +25% Power, +15% Boost, +11% Maneuverability |
||
| − | |- |
||
| − | |style="background:#ffcc00;border:none" rowspan="2" | <br><br> |
||
| − | [[File:CLASS.C.png|30px|link=]] |
||
| − | |{{ilink|Deflector Shield|Deflector Shield}} |
||
| − | |Energy shield that protects spacecraft |
||
| − | |- |
||
| − | |{{ilink|Ablative Armour|Ablative Armour}} |
||
| − | | +7% Shield Strength |
||
| − | |- |
||
| − | |style="background:#3399ff;border:none" rowspan="5" | <br><br> |
||
| − | [[File:CLASS.S.png|30px|link=]] |
||
| − | |||
| − | [[File:CLASS.A.png|30px|link=]] |
||
| − | |||
| − | [[File:CLASS.A.png|30px|link=]] |
||
| − | |||
| − | [[File:CLASS.B.png|30px|link=]] |
||
| − | |{{ilink|Hyperdrive}} |
||
| − | |Travel to Yellow Systems |
||
| − | |- |
||
| − | |{{ilink|Indium Drive|Indium Drive}} |
||
| − | |Travel to Yellow, Red, Green & Blue Systems |
||
| − | |- |
||
| − | |{{ilink|Emeril Drive}} |
||
| − | |Travel to Yellow, Red & Green Systems |
||
| − | |- |
||
| − | |{{ilink|Emergency Warp Unit|Emergency Warp Unit}} |
||
| − | |Allows escape from combat by warping |
||
| − | |- |
||
| − | |{{ilink|Cadmium Drive}} |
||
| − | |Travel to Yellow & Red Systems |
||
| − | |- |
||
| − | |style="background:#44fdff;border:none" rowspan="2" | <br><br> |
||
| − | [[File:CLASS.C.png|30px|link=]] |
||
| − | |{{ilink|Photon Cannon|Photon Cannon}} |
||
| − | |Rate: 7 shots/sec / Overheat: 5.6s / Cooldown: 4s |
||
| − | |- |
||
| − | |{{ilink|Nonlinear Optics|Non-Linear Optics}} |
||
| − | | +21% Heat Dispersion |
||
| − | |- |
||
| − | |style="background:#44ffa0;border:none" rowspan="2" | <br><br> |
||
| − | [[File:CLASS.B.png|30px|link=]] |
||
| − | |{{ilink|Phase Beam|Phase Beam}} |
||
| − | |Spacefaring beam weapon and asteroid mining tool |
||
| − | |- |
||
| − | |{{ilink|Fourier De-Limiter}} |
||
| − | | +11% Heat Dispersion |
||
| − | |- |
||
| − | |style="background:#fff8a6;border:none" rowspan="2" | <br><br> |
||
| − | [[File:CLASS.B.png|30px|link=]] |
||
| − | |{{ilink|Positron Ejector|Positron Ejector}} |
||
| − | |20 shot, wide cone of destruction, lacks range |
||
| − | |- |
||
| − | |{{ilink|Fragment Supercharger|Fragment Supercharger}} |
||
| − | | +20% Accuracy / +25% Range |
||
| − | |- |
||
| − | |style="background:#f64141;border:none" rowspan="2" | <br><br> |
||
| − | [[File:CLASS.B.png|30px|link=]] |
||
| − | |{{ilink|Infra-Knife Accelerator|Infra-Knife Accelerator}} |
||
| − | |Rapid sequences of fire. |
||
| − | |- |
||
| − | |{{ilink|Q-Resonator}} |
||
| − | |Changes 2 shot to 3 shot per volley, increasing Dmg |
||
| − | |- |
||
| − | |style="background:#cb459d;border:none" rowspan="2" | <br><br> |
||
| − | [[File:CLASS.B.png|30px|link=]] |
||
| − | |{{ilink|Cyclotron Ballista}} |
||
| − | |Large concentrated ball of charged particles |
||
| − | |- |
||
| − | |{{ilink|Dyson Pump|Dyson Pump}} |
||
| − | | +11% Heat Dispersion |
||
| − | |- |
||
| − | |style="background:#cd61ff;border:none" rowspan="2" | <br><br> |
||
| − | [[File:CLASS.B.png|30px|link=]] |
||
| − | |{{ilink|Rocket Launcher|Rocket Launcher}} |
||
| − | |Highly destructive weapon |
||
| − | |- |
||
| − | |{{ilink|Large Rocket Tubes|Large Rocket Tubes}} |
||
| − | | +20% Heat Recovery |
||
| − | |- |
||
| − | | |
||
| − | |{{ilink|Teleport Receiver|Teleport Receiver}} |
||
| − | |Increases material teleport range from 50u to 150u |
||
| − | |- |
||
| − | | |
||
| − | |{{ilink|Economy Scanner|Economy Scanner}} |
||
| − | |Grants ability to check a system's economy details |
||
| − | |- |
||
| − | | |
||
| − | |{{ilink|Conflict Scanner|Conflict Scanner}} |
||
| − | |Grants ability to check a system's Conflict Level |
||
| − | |} |
||
| − | |||
| − | ==== Upgrade Modules ==== |
||
| − | {| class="wikitable" |
||
| − | |- |
||
| − | ! rowspan="2" | |
||
| − | ! rowspan="2" |Module |
||
| − | Name |
||
| − | ! rowspan="2" |Stats |
||
| − | Drawn |
||
| − | ! rowspan="2" |''Module'' |
||
| − | ''Improves'' |
||
| − | ! colspan="2" |[[File:CLASS.C.png|30px|link=]] |
||
| − | ! colspan="2" |[[File:CLASS.B.png|30px|link=]] |
||
| − | ! colspan="2" |[[File:CLASS.A.png|30px|link=]] |
||
| − | ! colspan="2" |[[File:CLASS.S.png|30px|link=]] |
||
| − | ! colspan="2" |X-Class |
||
| − | |- |
||
| − | !Min |
||
| − | !Max |
||
| − | !Min |
||
| − | !Max |
||
| − | !Min |
||
| − | !Max |
||
| − | !Min |
||
| − | !Max |
||
| − | !Min |
||
| − | !Max |
||
| − | |- |
||
| − | |style="background:#f18700;border:none" rowspan="3" | |
||
| − | | rowspan="3" |{{ilink|Pulse Engine Upgrade|Pulse Engine}} |
||
| − | | rowspan="3" |C 1-2 |
||
| − | B 2 |
||
| − | |||
| − | A 2-3 |
||
| − | |||
| − | S 3 |
||
| − | |||
| − | X 1-3 |
||
| − | |''Fuel Efficiency'' |
||
| − | |5 |
||
| − | |10 |
||
| − | |10 |
||
| − | |15 |
||
| − | |15 |
||
| − | |20 |
||
| − | | colspan="2" |20 |
||
| − | |5 |
||
| − | |25 |
||
| − | |- |
||
| − | |''Maneuverability'' |
||
| − | |0 |
||
| − | |5 |
||
| − | |0 |
||
| − | |10 |
||
| − | |5 |
||
| − | |12 |
||
| − | |5 |
||
| − | |12 |
||
| − | |0 |
||
| − | |14 |
||
| − | |- |
||
| − | |''Boost'' |
||
| − | |0 |
||
| − | |5 |
||
| − | |5 |
||
| − | |10 |
||
| − | |5 |
||
| − | |15 |
||
| − | |10 |
||
| − | |15 |
||
| − | |0 |
||
| − | |20 |
||
| − | |- |
||
| − | |style="background:#ffcc00;border:none" rowspan="1" | |
||
| − | |"{{ilink|Deflector Shield Upgrade|Deflector Shield}} |
||
| − | |Always |
||
| − | |''Shield Strength'' |
||
| − | |10 |
||
| − | |20 |
||
| − | |10 |
||
| − | |20 |
||
| − | |20 |
||
| − | |30 |
||
| − | | colspan="2" |30 |
||
| − | |7.5 |
||
| − | |37.5 |
||
| − | |- |
||
| − | |style="background:#3399ff;border:none" rowspan="2" | |
||
| − | | rowspan="2" |{{ilink|Hyperdrive Upgrade|Hyperdrive}} |
||
| − | | rowspan="2" |C/B 1 |
||
| − | A/S 2 |
||
| − | |||
| − | X 1-2 |
||
| − | |''Warp Cell Efficiency'' |
||
| − | | colspan="2" |n/a |
||
| − | | colspan="2" |n/a |
||
| − | | colspan="2" |100 |
||
| − | | colspan="2" |100 |
||
| − | | colspan="2" |100 |
||
| − | |- |
||
| − | |''Hyperdrive Range'' |
||
| − | |50 |
||
| − | |100 |
||
| − | |100 |
||
| − | |150 |
||
| − | |150 |
||
| − | |200 |
||
| − | |200 |
||
| − | |250 |
||
| − | |50 |
||
| − | |300 |
||
| − | |- |
||
| − | |style="background:#44fdff;border:none" rowspan="3" | |
||
| − | | rowspan="3" |{{ilink|Photon Cannon Upgrade|Photon Cannon}} |
||
| − | (Damage Stats don't |
||
| − | |||
| − | appear as they should) |
||
| − | | rowspan="3" |C/B 1-2 |
||
| − | A 2-3 |
||
| − | |||
| − | S 3 |
||
| − | |||
| − | X 1-3 |
||
| − | |''Fire Rate'' |
||
| − | |0 |
||
| − | |1 |
||
| − | |1 |
||
| − | |2 |
||
| − | |2 |
||
| − | |3 |
||
| − | | colspan="2" |3 |
||
| − | |0 |
||
| − | |3 |
||
| − | |- |
||
| − | |''Heat Dispersion'' |
||
| − | |0 |
||
| − | |1 |
||
| − | |1 |
||
| − | |2 |
||
| − | |2 |
||
| − | |3 |
||
| − | | colspan="2" |3 |
||
| − | |0 |
||
| − | |4 |
||
| − | |- |
||
| − | |''Damage'' |
||
| − | |8 |
||
| − | |16 |
||
| − | |12 |
||
| − | |20 |
||
| − | |16 |
||
| − | |24 |
||
| − | |20 (6) |
||
| − | |28 (8) |
||
| − | |8 |
||
| − | |32 (9) |
||
| − | |- |
||
| − | |style="background:#44ffa0;border:none" rowspan="2" | |
||
| − | | rowspan="2" |{{ilink|Phase Beam Upgrade|Phase Beam}} |
||
| − | (Damage Stats don't |
||
| − | |||
| − | appear as they should) |
||
| − | | rowspan="2" |C/B 1-2 |
||
| − | A/S 2 |
||
| − | |||
| − | X 1-2 |
||
| − | |''Heat Dispersion'' |
||
| − | |10 |
||
| − | |35 |
||
| − | |35 |
||
| − | |55 |
||
| − | |55 |
||
| − | |75 |
||
| − | |75 |
||
| − | |95 |
||
| − | |10 |
||
| − | |100 |
||
| − | |- |
||
| − | |''Damage'' |
||
| − | |30 |
||
| − | |40 |
||
| − | |40 |
||
| − | |50 |
||
| − | |50 |
||
| − | |60 |
||
| − | |60 (24) |
||
| − | |70 (27) |
||
| − | |30 |
||
| − | |80 (30) |
||
| − | |- |
||
| − | |style="background:#fff8a6;border:none" rowspan="3" | |
||
| − | | rowspan="3" |{{ilink|Positron Ejector Upgrade|Positron}} |
||
| − | (Damage Stats don't |
||
| − | |||
| − | appear as they should) |
||
| − | | rowspan="3" |C 1-2 |
||
| − | B 2-3 |
||
| − | |||
| − | A/S 3 |
||
| − | |||
| − | X 1-3 |
||
| − | |''Fire Rate'' |
||
| − | |5 |
||
| − | |10 |
||
| − | |10 |
||
| − | |14 |
||
| − | |14 |
||
| − | |15 |
||
| − | | colspan="2" |15 |
||
| − | |5 |
||
| − | |20 |
||
| − | |- |
||
| − | |''Heat Dispersion'' |
||
| − | |1 |
||
| − | |5 |
||
| − | |5 |
||
| − | |10 |
||
| − | |10 |
||
| − | |15 |
||
| − | | colspan="2" |15 |
||
| − | |1 |
||
| − | |20 |
||
| − | |- |
||
| − | |''Damage'' |
||
| − | |2 |
||
| − | |6 |
||
| − | |4 |
||
| − | |10 |
||
| − | |8 |
||
| − | |10 |
||
| − | | colspan="2" |10 (3) |
||
| − | |2 |
||
| − | |12 (3) |
||
| − | |- |
||
| − | |style="background:#f64141;border:none" rowspan="3" | |
||
| − | | rowspan="3" |{{ilink|Infra-Knife Accelerator Upgrade|Infra-Knife}} |
||
| − | (Damage Stats don't |
||
| − | |||
| − | appear as they should) |
||
| − | | rowspan="3" |C 1-2 |
||
| − | B 2-3 |
||
| − | |||
| − | A/S 3 |
||
| − | |||
| − | X 1-3 |
||
| − | |''Fire Rate'' |
||
| − | |1 |
||
| − | |5 |
||
| − | |1 |
||
| − | |5 |
||
| − | |5 |
||
| − | |10 |
||
| − | |5 |
||
| − | |10 |
||
| − | |1 |
||
| − | |15 |
||
| − | |- |
||
| − | |''Heat Dispersion'' |
||
| − | |1 |
||
| − | |3 |
||
| − | |3 |
||
| − | |5 |
||
| − | |5 |
||
| − | |7 |
||
| − | |7 |
||
| − | |9 |
||
| − | |1 |
||
| − | |13 |
||
| − | |- |
||
| − | |''Damage'' |
||
| − | |2 |
||
| − | |6 |
||
| − | |4 |
||
| − | |10 |
||
| − | |8 |
||
| − | |12 |
||
| − | |10 (6) |
||
| − | |12 (7) |
||
| − | |2 |
||
| − | |14 (8) |
||
| − | |- |
||
| − | |style="background:#cb459d;border:none" rowspan="3" | |
||
| − | | rowspan="3" |{{ilink|Cyclotron Ballista Upgrade|Cyclotron}} |
||
| − | (Damage Stats don't |
||
| − | |||
| − | appear as they should) |
||
| − | | rowspan="3" |C 1-2 |
||
| − | B 2-3 |
||
| − | |||
| − | A/S 3 |
||
| − | |||
| − | X 1-3 |
||
| − | |''Fire Rate'' |
||
| − | |1 |
||
| − | |5 |
||
| − | |1 |
||
| − | |5 |
||
| − | |5 |
||
| − | |10 |
||
| − | |10 |
||
| − | |15 |
||
| − | |1 |
||
| − | |20 |
||
| − | |- |
||
| − | |''Heat Dispersion'' |
||
| − | |10 |
||
| − | |20 |
||
| − | |20 |
||
| − | |25 |
||
| − | |25 |
||
| − | |30 |
||
| − | |30 |
||
| − | |35 |
||
| − | |10 |
||
| − | |40 |
||
| − | |- |
||
| − | |''Damage'' |
||
| − | |2 |
||
| − | |6 |
||
| − | |4 |
||
| − | |10 |
||
| − | |8 |
||
| − | |12 |
||
| − | |10 |
||
| − | |12 |
||
| − | |2 |
||
| − | |14 |
||
| − | |} |
||
| − | Please add new modules directly to {{link|Pulse Engine Upgrade}}; {{link|Hyperdrive Upgrade}}; {{link|Deflector Shield Upgrade}}; |
||
| − | |||
| − | {{link|Photon Cannon Upgrade}}; {{link|Phase Beam Upgrade}}; {{link|Positron Ejector Upgrade}}; {{link|Infra-Knife Accelerator Upgrade}}; {{link|Cyclotron Ballista Upgrade}}. |
||
| − | |||
| − | === [[Starship#Living_Ship_-_Large_Tech_Inventory_.2F_Low_Shields|Living-ship]] Modules === |
||
| − | ==== Technology Blueprints ==== |
||
| − | {| class="wikitable" |
||
| − | ! |
||
| − | !Technology / Upgrade |
||
| − | !Effect |
||
| − | |- |
||
| − | |style="background:#ffffff;border:none" rowspan=1| |
||
| − | |{{ilink|Neural Assembly}} |
||
| − | |Vertical Take-off System |
||
| − | |- |
||
| − | |style="background:#f18700;border:none" rowspan=1| |
||
| − | |{{ilink|Pulsing Heart}} |
||
| − | |Starship Flight Booster |
||
| − | |- |
||
| − | |style="background:#3399ff;border:none" rowspan=1| |
||
| − | |{{ilink|Singularity Cortex}} |
||
| − | |Lightspeed Warp Drive |
||
| − | |- |
||
| − | |style="background:#fff8a6;border:none" rowspan=1| |
||
| − | |{{ilink|Scream Suppressor}} |
||
| − | | Spacecraft Hull Protection |
||
| − | |- |
||
| − | |style="background:#44ffa0;border:none" rowspan=1| |
||
| − | |{{ilink|Grafted Eyes}} |
||
| − | |Spacecraft Laser Device |
||
| − | |- |
||
| − | |style="background:#44fdff;border:none" rowspan=1| |
||
| − | |{{ilink|Spewing Vents}} |
||
| − | |Spacecraft Projectile Weapon |
||
| − | |} |
||
| − | |||
| − | ==== Upgrade Modules ==== |
||
| − | {| class="wikitable" |
||
| − | ! rowspan="2" | |
||
| − | ! rowspan="2" |'''Module''' |
||
| − | '''Name''' |
||
| − | ! rowspan="2" |'''Stats''' |
||
| − | Drawn |
||
| − | ! rowspan="2" |''Module'' |
||
| − | ''Improves'' |
||
| − | ! colspan="2" |[[File:CLASS.C.png|30px|link=]] |
||
| − | ! colspan="2" |[[File:CLASS.B.png|30px|link=]] |
||
| − | ! colspan="2" |[[File:CLASS.A.png|30px|link=]] |
||
| − | ! colspan="2" |[[File:CLASS.S.png|30px|link=]] |
||
| − | |- |
||
| − | !'''Min''' |
||
| − | !'''Max''' |
||
| − | !'''Min''' |
||
| − | !'''Max''' |
||
| − | !'''Min''' |
||
| − | !'''Max''' |
||
| − | !'''Min''' |
||
| − | !'''Max''' |
||
| − | |- |
||
| − | |style="background:#ffffff;border:none" rowspan="2" | |
||
| − | | rowspan="2" |{{ilink|Neural Assembly}} |
||
| − | |Always |
||
| − | |''Launch Cost'' |
||
| − | | -5 |
||
| − | | -10 |
||
| − | | -10 |
||
| − | | -15 |
||
| − | | -15 |
||
| − | | -20 |
||
| − | | colspan="2" | -20 |
||
| − | |- |
||
| − | | |
||
| − | |''Automatic Recharging'' |
||
| − | | colspan="6" |No |
||
| − | | colspan="2" |Yes |
||
| − | |- |
||
| − | |style="background:#f18700;border:none" rowspan="4" | |
||
| − | | rowspan="4" |{{ilink|Pulsing Heart|}} |
||
| − | | rowspan="3" |1-2 |
||
| − | |''Fuel Efficiency'' |
||
| − | |5 |
||
| − | | 10 |
||
| − | |10 |
||
| − | |15 |
||
| − | |15 |
||
| − | |20 |
||
| − | | colspan="2" |20 |
||
| − | |- |
||
| − | |''Maneuverability'' |
||
| − | |0 |
||
| − | |5 |
||
| − | |0 |
||
| − | |10 |
||
| − | |5 |
||
| − | |12 |
||
| − | | 5 |
||
| − | |12 |
||
| − | |- |
||
| − | |''Boost'' |
||
| − | |0 |
||
| − | |5 |
||
| − | |5 |
||
| − | |10 |
||
| − | |5 |
||
| − | |15 |
||
| − | |10 |
||
| − | |15 |
||
| − | |- |
||
| − | |Always |
||
| − | |''Teleport Receiver'' |
||
| − | | colspan="8" |Activated (Hidden) |
||
| − | |- |
||
| − | |style="background:#3399ff;border:none" rowspan="3" | |
||
| − | | rowspan="3" |{{ilink|Singularity Cortex}} |
||
| − | | Always |
||
| − | |''Hyperdrive Range'' |
||
| − | |50 |
||
| − | |100 |
||
| − | |100 |
||
| − | |150 |
||
| − | |150 |
||
| − | |200 |
||
| − | |200 |
||
| − | |250 |
||
| − | |- |
||
| − | | Possible |
||
| − | |''Warp Cell Efficiency'' |
||
| − | | colspan="4" | |
||
| − | | colspan="2" |100 |
||
| − | | colspan="2" |100 |
||
| − | |- |
||
| − | |Always |
||
| − | |''Hyperdrive Scramble'' |
||
| − | | colspan="8" |Activated (Hidden) |
||
| − | |- |
||
| − | |style="background:#fff8a6;border:none" rowspan="2" | |
||
| − | | rowspan="2" |{{ilink|Scream Suppressor}} |
||
| − | | rowspan="2" |Always |
||
| − | |''Shield Strength'' |
||
| − | |0.05 |
||
| − | |0.1 |
||
| − | |0.05 |
||
| − | |0.1 |
||
| − | |0.1 |
||
| − | | 0.2 |
||
| − | | colspan="2" |0.2 (30) |
||
| − | |- |
||
| − | |''Scan'' |
||
| − | | colspan="8" |Activated (Hidden) |
||
| − | |- |
||
| − | |style="background:#44ffa0;border:none" rowspan="2" | |
||
| − | | rowspan="2" |{{ilink|Grafted Eyes}} |
||
| − | (Damage Stats don't |
||
| − | |||
| − | appear as they should) |
||
| − | | rowspan="2" |1-2 |
||
| − | |''Heat Dispersion'' |
||
| − | | 10 |
||
| − | |35 |
||
| − | |35 |
||
| − | |55 |
||
| − | |55 |
||
| − | | 75 |
||
| − | |75 |
||
| − | |95 |
||
| − | |- |
||
| − | |''Damage'' |
||
| − | |30 |
||
| − | |40 |
||
| − | |40 |
||
| − | |50 |
||
| − | |50 |
||
| − | |60 |
||
| − | |60 (24) |
||
| − | |70 (27) |
||
| − | |- |
||
| − | |style="background:#44fdff;border:none" rowspan="3" | |
||
| − | | rowspan="3" |{{ilink|Spewing Vents}} |
||
| − | (Stats don't appear |
||
| − | |||
| − | as they should) |
||
| − | | rowspan="3" |1-2 |
||
| − | |''Fire Rate'' |
||
| − | |0 |
||
| − | |1 |
||
| − | |1 |
||
| − | |2 |
||
| − | | colspan="2" |2 |
||
| − | | colspan="2" |2.1 (3) |
||
| − | |- |
||
| − | |''Heat Dispersion'' |
||
| − | |0 |
||
| − | |1 |
||
| − | |1 |
||
| − | |2 |
||
| − | |2 |
||
| − | |3 |
||
| − | |1900 |
||
| − | |2700 (3) |
||
| − | |- |
||
| − | |''Damage'' |
||
| − | |8 |
||
| − | |16 |
||
| − | |12 |
||
| − | |20 |
||
| − | |16 |
||
| − | |24 |
||
| − | | 20 (6) |
||
| − | |28 (8) |
||
| − | |} |
||
| − | |||
| − | === [[Multi-tool]] Modules === |
||
| − | ==== Technology Blueprints ==== |
||
| − | {| class="wikitable" |
||
| − | |- |
||
| − | ! |
||
| − | !Technology / Upgrade |
||
| − | !Effect |
||
| − | |- |
||
| − | | |
||
| − | |{{ilink|Analysis Visor}} |
||
| − | |Allows you to scan your environment |
||
| − | |- |
||
| − | |[[File:CLASS.A.png|30px|link=]] |
||
| − | |{{ilink|Survey Device|}} |
||
| − | |Allows you to search for hotspots |
||
| − | |- |
||
| − | |style="background:#fff8a6;border:none" rowspan=2| <br><br> |
||
| − | [[File:CLASS.B.png|30px|link=]] |
||
| − | |{{ilink|Scanner}} |
||
| − | |Highlights a selection of resources within its scan radius |
||
| − | |- |
||
| − | |{{ilink|Waveform Recycler}} |
||
| − | | -20% Recharge Time / +11% Scan Radius |
||
| − | |- |
||
| − | |style="background:#22ef87;border:none" rowspan="4" | <br><br> |
||
| − | [[File:CLASS.S.png|30px|link=]] |
||
| − | |||
| − | [[File:CLASS.A.png|30px|link=]] |
||
| − | |||
| − | [[File:CLASS.C.png|30px|link=]] |
||
| − | |{{ilink|Mining Beam}} |
||
| − | |Fires an intense laser beam at its target. Used for mining |
||
| − | |- |
||
| − | |{{ilink|Optical Drill}} |
||
| − | | +50% to mined resources |
||
| − | |- |
||
| − | |{{ilink|Advanced Mining Laser|Advanced Mining Laser}} |
||
| − | |Enables mining of larger rocks / +11% Mining Speed |
||
| − | |- |
||
| − | |{{ilink|Plasma Resonator}} |
||
| − | | +6% Mining Speed / +5% Heat Dispersion |
||
| − | |- |
||
| − | |style="background:#3399ff;border:none" rowspan="4" | <br><br> |
||
| − | [[File:CLASS.A.png|30px|link=]] |
||
| − | |||
| − | [[File:CLASS.C.png|30px|link=]] |
||
| − | |||
| − | [[File:CLASS.C.png|30px|link=]] |
||
| − | |{{ilink|Boltcaster}} |
||
| − | | Assault rifle |
||
| − | |- |
||
| − | |{{ilink|Boltcaster Ricochet Module|Boltcaster Ricochet}} |
||
| − | |Makes bullets bounce |
||
| − | |- |
||
| − | |{{ilink|Barrel Ioniser|Barrel Ioniser}} |
||
| − | | +31% Accuracy |
||
| − | |- |
||
| − | |{{ilink|Boltcaster SM|Boltcaster SM}} |
||
| − | | +1% Damage / +21% Fire Rate / +8.0 Clip Size |
||
| − | |- |
||
| − | |style="background:#f64141;border:none" rowspan="2" | <br><br> |
||
| − | [[File:CLASS.C.png|30px|link=]] |
||
| − | |{{ilink|Blaze Javelin}} |
||
| − | |Charged energy weapon. Longer hold = more power |
||
| − | |- |
||
| − | |{{ilink|Mass Accelerator}} |
||
| − | | +20% Damage |
||
| − | |- |
||
| − | |style="background:#44ffa0;border:none" rowspan="3" | <br><br> |
||
| − | [[File:CLASS.A.png|30px|link=]] |
||
| − | |||
| − | [[File:CLASS.C.png|30px|link=]] |
||
| − | |{{ilink|Pulse Spitter}} |
||
| − | |Machine Gun |
||
| − | |- |
||
| − | |{{ilink|Pulse Spitter Ricochet Module|Pulse Spitter Ricochet}} |
||
| − | |Makes bullets bounce |
||
| − | |- |
||
| − | |{{ilink|Amplified Cartridges|Amplified Cartridges}} |
||
| − | | +20.0 Clip Size |
||
| − | |- |
||
| − | |style="background:#ffcc00;border:none" rowspan="2" | <br><br> |
||
| − | [[File:CLASS.C.png|30px|link=]] |
||
| − | |{{ilink|Scatter Blaster}} |
||
| − | |Shotgun |
||
| − | |- |
||
| − | |{{ilink|Shell Greaser|Shell Greaser}} |
||
| − | | -11% Reload Time |
||
| − | |- |
||
| − | | |
||
| − | |{{ilink|Incinerator}} |
||
| − | |Flamethrower |
||
| − | |- |
||
| − | | |
||
| − | |{{ilink|Solar Ray}} |
||
| − | |Mines deposits for Liquid Sun |
||
| − | |- |
||
| − | | |
||
| − | |{{ilink|Animus Beam|Animus Beam}} |
||
| − | |Good against Fauna. Gives Fragmented Qualia |
||
| − | |- |
||
| − | | |
||
| − | |{{ilink|Terrain Manipulator}} |
||
| − | |Add, remove, restore or flatten terrain |
||
| − | |- |
||
| − | |style="background:#cb459d;border:none" rowspan=1| |
||
| − | |{{ilink|Plasma Launcher}} |
||
| − | |Grenade |
||
| − | |- |
||
| − | |style="background:#cd61ff;border:none" rowspan=1| |
||
| − | |{{ilink|Geology Cannon}} |
||
| − | |Grenade that damages the ground |
||
| − | |- |
||
| − | | |
||
| − | |{{ilink|Combat Scope}} |
||
| − | |Allows you to zoom |
||
| − | |- |
||
| − | | |
||
| − | |{{ilink|Personal Forcefield}} |
||
| − | |A temporary forcefield |
||
| − | |} |
||
| − | |||
| − | ==== Upgrade Modules ==== |
||
| − | {| class="wikitable" |
||
| − | |- |
||
| − | ! rowspan="2" | |
||
| − | ! rowspan="2" |'''Module''' |
||
| − | '''Name''' |
||
| − | ! rowspan="2" |'''Stats''' |
||
| − | '''Drawn''' |
||
| − | ! rowspan="2" |''Module'' |
||
| − | ''Improves'' |
||
| − | ! colspan="2" |[[File:CLASS.C.png|30px|link=]] |
||
| − | ! colspan="2" |[[File:CLASS.B.png|30px|link=]] |
||
| − | ! colspan="2" |[[File:CLASS.A.png|30px|link=]] |
||
| − | ! colspan="2" |[[File:CLASS.S.png|30px|link=]] |
||
| − | ! colspan="2" |X-Class |
||
| − | |- |
||
| − | !'''Min''' |
||
| − | !'''Max''' |
||
| − | !'''Min''' |
||
| − | !'''Max''' |
||
| − | !'''Min''' |
||
| − | !'''Max''' |
||
| − | !'''Min''' |
||
| − | !'''Max''' |
||
| − | !'''Min''' |
||
| − | !'''Max''' |
||
| − | |- |
||
| − | |style="background:#fff8a6;border:none" rowspan="3" | |
||
| − | | rowspan="3" |{{ilink|Waveform Recycler| }}Scanner |
||
| − | | rowspan="3" |C 1-2 |
||
| − | B 2 |
||
| − | |||
| − | A 2-3 |
||
| − | |||
| − | S 3 |
||
| − | |[[File:Upgradecat.scan.png|25x25px]]''Scan Radius'' |
||
| − | |5 |
||
| − | | 10 |
||
| − | |10 |
||
| − | |20 |
||
| − | |20 |
||
| − | |30 |
||
| − | |30 |
||
| − | |40 |
||
| − | |5 |
||
| − | |50 |
||
| − | |- |
||
| − | |[[File:Upgradecat.scan.png|25x25px]]''Flora Scanned'' |
||
| − | |1000 |
||
| − | |2000 |
||
| − | | 2500 |
||
| − | |5000 |
||
| − | |5000 |
||
| − | |9999 |
||
| − | |6500 |
||
| − | |9999 |
||
| − | |1000 |
||
| − | |11000 |
||
| − | |- |
||
| − | |[[File:Upgradecat.scan.png|25x25px]]''Fauna Scanned'' |
||
| − | | 1000 |
||
| − | |2000 |
||
| − | | 2500 |
||
| − | |5000 |
||
| − | |5000 |
||
| − | |9999 |
||
| − | |6500 |
||
| − | |9999 |
||
| − | |1000 |
||
| − | |11000 |
||
| − | |- |
||
| − | |style="background:#22ef87;border:none" rowspan="4" | |
||
| − | | rowspan="4" |{{ilink|Mining Beam Upgrade|Mining Beam}} |
||
| − | | rowspan="4" |C 1-2 |
||
| − | B 2-3 |
||
| − | |||
| − | A 3-4 |
||
| − | |||
| − | S 4 |
||
| − | |[[File:UPGRADECAT.SPEED.png|25px|link=]]''Mining Speed'' |
||
| − | |5 |
||
| − | |10 |
||
| − | |5 |
||
| − | |15 |
||
| − | |10 |
||
| − | |20 |
||
| − | |15 |
||
| − | |20 |
||
| − | |5 |
||
| − | |20 |
||
| − | |- |
||
| − | |[[File:Upgradecat.energy.png|top|20px|link=https://nomanssky.gamepedia.com/File:Upgradecat.energy.png]]''Fuel Efficiency'' |
||
| − | |0 |
||
| − | |10 |
||
| − | |10 |
||
| − | | 15 |
||
| − | |15 |
||
| − | |20 |
||
| − | | colspan="2" |20 (21) |
||
| − | |1 |
||
| − | |26 |
||
| − | |- |
||
| − | |[[File:Upgradecat.time.png|25px|link=]]''Heat Dispersion'' |
||
| − | |5 |
||
| − | | 15 |
||
| − | |15 |
||
| − | | 20 |
||
| − | |20 |
||
| − | |40 |
||
| − | |40 |
||
| − | | 50 |
||
| − | |5 |
||
| − | |55 |
||
| − | |- |
||
| − | |[[File:Upgradecat.time.png|25px|link=]]''Overheat Downtime'' |
||
| − | |5 |
||
| − | |10 |
||
| − | |10 |
||
| − | |15 |
||
| − | |10 |
||
| − | |15 |
||
| − | |15 |
||
| − | |20 |
||
| − | |5 |
||
| − | |25 |
||
| − | |- |
||
| − | |style="background:#3399ff;border:none" rowspan="6" | |
||
| − | | rowspan="6" |{{ilink|Boltcaster Upgrade|Boltcaster}} |
||
| − | (Needs Testing |
||
| − | |||
| − | Desolation) |
||
| − | | rowspan="6" |C 1-2 |
||
| − | B 2-3 |
||
| − | |||
| − | A 3-4 |
||
| − | |||
| − | S 4 |
||
| − | |[[File:Upgradecat.damage.png|25px|link=]]''Damage'' |
||
| − | | colspan="2" |1 |
||
| − | |1 |
||
| − | |2 |
||
| − | |2 |
||
| − | | 3 |
||
| − | |3 |
||
| − | |4 |
||
| − | |1 |
||
| − | |5 |
||
| − | |- |
||
| − | |[[File:Upgradecat.time.png|25px|link=]]''Reload Time'' |
||
| − | |5 |
||
| − | |10 |
||
| − | |10 |
||
| − | |15 |
||
| − | |10 |
||
| − | |20 |
||
| − | |10 |
||
| − | |20 |
||
| − | |5 |
||
| − | |25 |
||
| − | |- |
||
| − | |[[File:UPGRADECAT.SPEED.png|25px|link=]]''Fire Rate'' |
||
| − | |0 |
||
| − | |10 |
||
| − | |5 |
||
| − | |10 |
||
| − | |10 |
||
| − | |15 |
||
| − | |10 |
||
| − | |15 |
||
| − | |0 |
||
| − | |20 |
||
| − | |- |
||
| − | |[[File:Upgradecat.time.png|25px|link=]]''Burst Cooldown'' |
||
| − | | |
||
| − | | |
||
| − | | |
||
| − | | |
||
| − | | |
||
| − | | |
||
| − | | colspan="2" |15 |
||
| − | |0 |
||
| − | |20 |
||
| − | |- |
||
| − | |[[File:UPGRADECAT.CLIP.png|25px|link=]]''Shots Per Burst'' |
||
| − | | |
||
| − | | |
||
| − | | |
||
| − | | |
||
| − | | |
||
| − | | |
||
| − | |1.2 |
||
| − | |1.4 |
||
| − | |1 |
||
| − | |2 |
||
| − | |- |
||
| − | |[[File:UPGRADECAT.CLIP.png|25px|link=]]''Clip Size'' |
||
| − | | colspan="2" |2 |
||
| − | | colspan="2" | 4 |
||
| − | | colspan="2" |6 |
||
| − | | colspan="2" | 8 |
||
| − | |2 |
||
| − | |10 |
||
| − | |- |
||
| − | |style="background:#f64141;border:none" rowspan="2" | |
||
| − | | rowspan="2" |{{ilink|Blaze Javelin Upgrade|Blaze Javelin}} |
||
| − | | rowspan="2" |C 1 |
||
| − | B 1-2 |
||
| − | |||
| − | A 2 |
||
| − | |||
| − | S 2 |
||
| − | |[[File:Upgradecat.damage.png|25px|link=]]''Damage'' |
||
| − | | colspan="2" |30-40 (1) |
||
| − | | colspan="2" | 40-50 (2) |
||
| − | | colspan="2" |50-60 (3) |
||
| − | | colspan="2" |60-75 (4) |
||
| − | |30 |
||
| − | |85 |
||
| − | |- |
||
| − | |''Time To Full Power'' |
||
| − | |5 |
||
| − | |10 |
||
| − | |10 |
||
| − | |15 |
||
| − | |10 |
||
| − | |20 |
||
| − | | 10 |
||
| − | |20 |
||
| − | |5 |
||
| − | |25 |
||
| − | |- |
||
| − | |style="background:#44ffa0;border:none" rowspan="4" | |
||
| − | | rowspan="4" |{{ilink|Pulse Spitter Upgrade|Pulse Spitter}} |
||
| − | (Needs Testing |
||
| − | |||
| − | Desolation) |
||
| − | | rowspan="4" |C 1-2 |
||
| − | B 2-3 |
||
| − | |||
| − | A 3-4 |
||
| − | |||
| − | S 4 |
||
| − | |[[File:Upgradecat.damage.png|25px|link=]]''Damage'' |
||
| − | | colspan="2" |1 |
||
| − | |1 |
||
| − | |2 |
||
| − | | 1 |
||
| − | |3 |
||
| − | |2 (6) |
||
| − | |3 (9) |
||
| − | |1 |
||
| − | |4 |
||
| − | |- |
||
| − | |[[File:Upgradecat.time.png|25px|link=]]''Reload Time'' |
||
| − | | colspan="2" |n/a |
||
| − | |0 |
||
| − | | 10 |
||
| − | | 0 |
||
| − | |10 |
||
| − | |5 |
||
| − | |10 |
||
| − | |0 |
||
| − | |15 |
||
| − | |- |
||
| − | |[[File:UPGRADECAT.SPEED.png|25px|link=]]''Fire Rate'' |
||
| − | |0 |
||
| − | |10 |
||
| − | |0 |
||
| − | |10 |
||
| − | |5 |
||
| − | |10 |
||
| − | |10 |
||
| − | |15 |
||
| − | |0 |
||
| − | |20 |
||
| − | |- |
||
| − | |[[File:UPGRADECAT.CLIP.png|25px|link=]]''Clip Size'' |
||
| − | | colspan="2" |12 |
||
| − | | colspan="2" |12 |
||
| − | | colspan="2" |12 |
||
| − | | colspan="2" |12 |
||
| − | | colspan="2" |12 |
||
| − | |- |
||
| − | | rowspan="6" style="background:#ffcc00;border:none" | |
||
| − | | rowspan="6" |{{ilink|Scatter Blaster Upgrade|Scatter Blaster}} |
||
| − | | rowspan="6" |C 1-2 |
||
| − | B 2-3 |
||
| − | |||
| − | A 3-4 |
||
| − | |||
| − | S 4 |
||
| − | |[[File:Upgradecat.damage.png|25px|link=]]''Damage'' |
||
| − | | colspan="2" |1 |
||
| − | |1 |
||
| − | |3 |
||
| − | |2 |
||
| − | |4 |
||
| − | |3 |
||
| − | | 5 |
||
| − | |1 |
||
| − | |6 |
||
| − | |- |
||
| − | |[[File:Upgradecat.time.png|25px|link=]]''Reload Time'' |
||
| − | |5 |
||
| − | |10 |
||
| − | | 10 |
||
| − | |15 |
||
| − | |15 |
||
| − | |20 |
||
| − | |20 |
||
| − | |25 |
||
| − | |5 |
||
| − | |30 |
||
| − | |- |
||
| − | |[[File:UPGRADECAT.SPEED.png|25px|link=]]''Fire Rate'' |
||
| − | | colspan="2" |n/a |
||
| − | |0 |
||
| − | |5 |
||
| − | |5 |
||
| − | |10 |
||
| − | |10 |
||
| − | |15 |
||
| − | |0 |
||
| − | |20 |
||
| − | |- |
||
| − | |[[File:UPGRADECAT.CLIP.png|25px|link=]]''Clip Size'' |
||
| − | | colspan="2" |n/a |
||
| − | | colspan="2" |8 |
||
| − | | colspan="2" |8 |
||
| − | | colspan="2" |8 |
||
| − | | colspan="2" |8 |
||
| − | |- |
||
| − | |[[File:UPGRADECAT.CLIP.png|25px|link=]]''Shots Per Burst'' |
||
| − | | |
||
| − | | |
||
| − | | |
||
| − | | |
||
| − | | |
||
| − | | |
||
| − | | colspan="2" |1 |
||
| − | | colspan="2" |1 |
||
| − | |- |
||
| − | |[[File:Upgradecat.time.png|25px|link=]]''Burst Cooldown'' |
||
| − | | |
||
| − | | |
||
| − | | |
||
| − | | |
||
| − | | |
||
| − | | |
||
| − | |15 |
||
| − | |20 |
||
| − | |5 |
||
| − | |25 |
||
| − | |- |
||
| − | | rowspan="4" style="background:#cb459d;border:none" | |
||
| − | | rowspan="4" |{{ilink|Plasma Launcher Upgrade|Plasma Launcher}} |
||
| − | | rowspan="4" |C 1-2 |
||
| − | B 1-3 |
||
| − | |||
| − | A 2-3 |
||
| − | |||
| − | S 3 |
||
| − | |[[File:Upgradecat.damage.png|25px|link=]]''Damage'' |
||
| − | |10 |
||
| − | |20 |
||
| − | |20 |
||
| − | |30 |
||
| − | |30 |
||
| − | |40 |
||
| − | |35 |
||
| − | |40 |
||
| − | |350 |
||
| − | |400 |
||
| − | |- |
||
| − | |[[File:Upgradecat.scan.png|25x25px]]''Explosion Radius'' |
||
| − | |0 |
||
| − | |5 |
||
| − | |5 |
||
| − | |10 |
||
| − | |5 |
||
| − | |10 |
||
| − | | 10 |
||
| − | |15 |
||
| − | |0 |
||
| − | |20 |
||
| − | |- |
||
| − | |[[File:UPGRADECAT.SPEED.png|25px|link=]]''Projectile Velocity'' |
||
| − | |100 |
||
| − | |200 |
||
| − | |100 |
||
| − | | 300 |
||
| − | | 100 |
||
| − | | 300 |
||
| − | | 200 |
||
| − | |300 |
||
| − | |100 |
||
| − | |400 |
||
| − | |- |
||
| − | |[[File:Upgradecat.generic.png|25x25px]]''Bounce Potential'' |
||
| − | | colspan="2" |1 |
||
| − | |1 |
||
| − | |2 |
||
| − | |2 |
||
| − | | 3 |
||
| − | | colspan="2" |3 |
||
| − | |1 |
||
| − | |4 |
||
| − | |- |
||
| − | | rowspan="3" style="background:#cd61ff;border:none" | |
||
| − | | rowspan="3" |{{ilink|Geology Cannon Upgrade|Geology Cannon}} |
||
| − | | rowspan="3" |C 1 |
||
| − | B 1-2 |
||
| − | |||
| − | A 1-2 |
||
| − | |||
| − | S 2 |
||
| − | |[[File:Upgradecat.damage.png|25px|link=]]''Damage'' |
||
| − | |10 |
||
| − | |20 |
||
| − | |20 |
||
| − | |30 |
||
| − | |30 |
||
| − | |40 |
||
| − | |35 |
||
| − | | 40 |
||
| − | |10 |
||
| − | |45 |
||
| − | |- |
||
| − | |[[File:Upgradecat.scan.png|25x25px]]''Explosion Radius'' |
||
| − | |10 |
||
| − | |20 |
||
| − | | 20 |
||
| − | |30 |
||
| − | |30 |
||
| − | |50 |
||
| − | |40 |
||
| − | | 50 |
||
| − | |10 |
||
| − | |60 |
||
| − | |- |
||
| − | |[[File:UPGRADECAT.SPEED.png|25px|link=]]''Projectile Velocity'' |
||
| − | |100 |
||
| − | | 200 |
||
| − | |100 |
||
| − | |300 |
||
| − | |100 |
||
| − | | 300 |
||
| − | |200 |
||
| − | | 300 |
||
| − | |100 |
||
| − | |400 |
||
| − | |}'''Please add new modules directly to''' {{link|Mining Beam Upgrade}}; {{link|Analysis Visor Upgrade}}; {{link|Boltcaster Upgrade}}; {{link|Plasma Launcher Upgrade}}; {{link|Geology Cannon Upgrade}}; {{link|Blaze Javelin Upgrade}}; {{link|Scatter Blaster Upgrade}}; {{link|Pulse Spitter Upgrade}}.''' |
||
| − | |||
| − | === [[Exocraft]] Modules === |
||
| − | Exocraft modules can be purchased from the [[Exocraft Technician]] (requires a built {{link|Exocraft Terminal}}) as well as from any space station marketplace. |
||
| − | |||
| − | === Exocraft - [[Exocraft#Roamer|Roamer]] / [[Exocraft#Colossus|Colossus]] / [[Exocraft#Nomad|Nomad]] / [[Exocraft#Pilgrim|Pilgrim]] === |
||
| − | |||
| − | ==== Technology Blueprints ==== |
||
| − | {| class="wikitable" |
||
| − | |- |
||
| − | ! |
||
| − | !Technology / Upgrade |
||
| − | !Effect |
||
| − | |- |
||
| − | |style="background:#195771;border:none" rowspan=1| |
||
| − | |{{ilink|Fusion Engine|Fusion Engine}} |
||
| − | |Engine |
||
| − | |- |
||
| − | | |
||
| − | |{{ilink|Icarus Fuel System|Icarus Fuel System}} |
||
| − | |Generates energy during daylight hours |
||
| − | |- |
||
| − | |style="background:#067D84;border:none" rowspan=1| |
||
| − | |{{ilink|Exocraft Acceleration Module|E.Acceleration Module}} |
||
| − | | Allows short bursts of speed |
||
| − | |- |
||
| − | |style="background:#3399ff;border:none" rowspan="2" | <br><br> |
||
| − | [[File:CLASS.A.png|30px|link=]] |
||
| − | |{{ilink|Exocraft Mining Laser|E.Mining Laser}} |
||
| − | |Mining Laser with no overheat |
||
| − | |- |
||
| − | |{{ilink|Exocraft Mining Laser Upgrade Sigma|E.Mining Laser Sigma}} |
||
| − | |Ability to harvest tough minerals / +20% Mining Laser Power |
||
| − | |- |
||
| − | |style="background:#01325C;border:none" rowspan=1| |
||
| − | |{{ilink|Exocraft Mounted Cannon|E.Mounted Cannon}} |
||
| − | |Lobs explosives toward targets |
||
| − | |- |
||
| − | |style="background:#02799A;border:none" rowspan="3" | <br><br> |
||
| − | [[File:CLASS.A.png|30px|link=]] |
||
| − | |||
| − | [[File:CLASS.B.png|30px|link=]] |
||
| − | |{{ilink|Exocraft Signal Booster|E.Signal Booster}} |
||
| − | |Finds Resource Deposits & Depots / +100% Scan |
||
| − | |- |
||
| − | |{{ilink|Exocraft Signal Booster Upgrade Tau|E.Signal Booster Tau}} |
||
| − | |Finds Ruins & Monoliths / +100% Scan |
||
| − | |- |
||
| − | |{{ilink|Advanced Signal Booster|E. Advanced Signal Booster}} |
||
| − | |Finds Abandoned Buildings & Drop Pods / +100% Scan |
||
| − | |- |
||
| − | |style="background:#0CAFB8;border:none" rowspan="3" |[[File:CLASS.A.png|30px|link=]] |
||
| − | [[File:CLASS.A.png|30px|link=]] |
||
| − | |||
| − | [[File:CLASS.A.png|30px|link=]] |
||
| − | |{{ilink|Drift Suspension}} |
||
| − | |Drift / +200% Forwards Grip / -34% Angular Grip |
||
| − | |- |
||
| − | |{{ilink|Grip Boost Suspension}} |
||
| − | | Sharp Turns / -50% Forwards Grip / +110% Angular Grip |
||
| − | |- |
||
| − | |{{ilink|Hi-Slide Suspension}} |
||
| − | |Slide / -50% Forwards Grip / -34% Angular Grip |
||
| − | |- |
||
| − | |style="background:#c9d0e4;border:none" rowspan="4" | |
||
| − | |{{ilink|Air Filtration Unit}} |
||
| − | |Protects against Toxic environments |
||
| − | |- |
||
| − | |{{ilink|Neutron Shielding}} |
||
| − | | Protects against Radioactive environments |
||
| − | |- |
||
| − | |{{ilink|Megawatt Heater}} |
||
| − | |Protects against Cold environments |
||
| − | |- |
||
| − | |{{ilink|Thermal Buffer}} |
||
| − | |Protects against Hot environments |
||
| − | |} |
||
| − | |||
| − | ==== Upgrade Modules ==== |
||
| − | {| class="wikitable" |
||
| − | |- |
||
| − | ! rowspan="2" | |
||
| − | ! rowspan="2" |Module |
||
| − | Name |
||
| − | ! rowspan="2" |Stats |
||
| − | Drawn |
||
| − | ! rowspan="2" |''Module'' |
||
| − | ''Improves'' |
||
| − | ! colspan="2" |[[File:CLASS.C.png|30px|link=]] |
||
| − | ! colspan="2" |[[File:CLASS.B.png|30px|link=]] |
||
| − | ! colspan="2" |[[File:CLASS.A.png|30px|link=]] |
||
| − | ! colspan="2" |[[File:CLASS.S.png|30px|link=]] |
||
| − | |- |
||
| − | !Min |
||
| − | !Max |
||
| − | !Min |
||
| − | !Max |
||
| − | !Min |
||
| − | !Max |
||
| − | !Min |
||
| − | !Max |
||
| − | |- |
||
| − | |style="background:#195771;border:none" rowspan="2" | |
||
| − | | rowspan="2" |{{ilink|Fusion Engine Upgrade|Engine}} |
||
| − | | rowspan="2" |C 1 |
||
| − | B/A 1-2 |
||
| − | |||
| − | S 2 |
||
| − | |''Top Speed'' |
||
| − | |1 |
||
| − | |3 |
||
| − | |3 |
||
| − | |8 |
||
| − | |8 |
||
| − | |15 |
||
| − | |10 |
||
| − | |15 |
||
| − | |- |
||
| − | |''Fuel Usage'' |
||
| − | |1 |
||
| − | |5 |
||
| − | |5 |
||
| − | |10 |
||
| − | |10 |
||
| − | |15 |
||
| − | | 15 |
||
| − | |20 |
||
| − | |- |
||
| − | |style="background:#067D84;border:none" rowspan="2" | |
||
| − | | rowspan="2" |{{ilink|Exocraft Acceleration Module Upgrade|Boost}} |
||
| − | | rowspan="2" |C 1 |
||
| − | B/A 1-2 |
||
| − | |||
| − | S 2 |
||
| − | |''Boost Power'' |
||
| − | |10 |
||
| − | |20 |
||
| − | |20 |
||
| − | |35 |
||
| − | |35 |
||
| − | |55 |
||
| − | |55 |
||
| − | |70 |
||
| − | |- |
||
| − | |''Tank Size'' |
||
| − | |10 |
||
| − | |20 |
||
| − | |15 |
||
| − | |30 |
||
| − | | 30 |
||
| − | |50 |
||
| − | |50 |
||
| − | |60 |
||
| − | |- |
||
| − | |style="background:#3399ff;border:none" rowspan="2" | |
||
| − | | rowspan="2" |{{ilink|Exocraft Mining Laser Upgrade|Laser}} |
||
| − | (Laser Power |
||
| − | |||
| − | needs testing) |
||
| − | | rowspan="2" |C 1 |
||
| − | B/A 1-2 |
||
| − | |||
| − | S 2 |
||
| − | |''Laser Power'' |
||
| − | |<small><sub>5</sub></small> |
||
| − | |<small><sub>10</sub></small> |
||
| − | |<small><sub>10</sub></small> |
||
| − | |<small><sub>20</sub></small> |
||
| − | |<small><sub>20</sub></small> |
||
| − | |<small><sub>30</sub></small> |
||
| − | |<small><sub>30</sub></small> |
||
| − | |<small><sub>50</sub></small> |
||
| − | |- |
||
| − | |''Laser Efficiency'' |
||
| − | | 1 |
||
| − | |5 |
||
| − | |5 |
||
| − | |10 |
||
| − | | 10 |
||
| − | |15 |
||
| − | |15 |
||
| − | |20 |
||
| − | |- |
||
| − | |style="background:#01325C;border:none" rowspan="3" | |
||
| − | | rowspan="3" |{{ilink|Exocraft Mounted Cannon Upgrade|Cannon}} |
||
| − | (Damage Stats don't |
||
| − | |||
| − | appear as they should) |
||
| − | | rowspan="3" |C 1-2 |
||
| − | B 2-3 |
||
| − | |||
| − | A/S 3 |
||
| − | |''Damage'' |
||
| − | |5 |
||
| − | | 10 |
||
| − | |10 |
||
| − | |20 |
||
| − | |20 |
||
| − | |30 |
||
| − | |30 (12) |
||
| − | |40 (17) |
||
| − | |- |
||
| − | |''Rate Of Fire'' |
||
| − | |1 |
||
| − | |5 |
||
| − | |5 |
||
| − | |10 |
||
| − | |10 |
||
| − | |15 |
||
| − | |15 |
||
| − | |20 (21) |
||
| − | |- |
||
| − | |''Weapon Efficiency'' |
||
| − | |1 |
||
| − | |5 |
||
| − | |5 |
||
| − | |10 |
||
| − | |10 |
||
| − | |15 |
||
| − | |15 |
||
| − | |20 |
||
| − | |} |
||
| − | Please add new modules directly to {{link|Exocraft Mounted Cannon Upgrade}}; {{link|Exocraft Mining Laser Upgrade}}; {{link|Exocraft Acceleration Module Upgrade}}; {{link|Fusion Engine Upgrade}} |
||
| − | |||
| − | === [[Exocraft#Minotaur|Exocraft - Minotaur]] === |
||
| − | |||
| − | ==== Technology Blueprints ==== |
||
| − | {| class="wikitable" |
||
| − | ! |
||
| − | !Technology / Upgrade |
||
| − | !Effect |
||
| − | |- |
||
| − | |style="background:#195771;border:none" rowspan="2" | |
||
| − | |{{ilink|Daedalus Engine}} |
||
| − | |Engine |
||
| − | |- |
||
| − | |{{ilink|Self-Greasing Servos|Self-Greasing Servos}} |
||
| − | |Significantly reduces fuel burn in the engine |
||
| − | |- |
||
| − | | |
||
| − | |{{ilink|Icarus Fuel System|Icarus Fuel System}} |
||
| − | | Generates energy during daylight hours |
||
| − | |- |
||
| − | | |
||
| − | |{{ilink|Ariadne's Flame}} |
||
| − | |Jet thrusters |
||
| − | |- |
||
| − | |style="background:#3399ff;border:none" rowspan="2" | <br><br> |
||
| − | [[File:CLASS.A.png|30px|link=]] |
||
| − | |{{ilink|Minotaur Laser}} |
||
| − | |Mining Laser with no overheat |
||
| − | |- |
||
| − | |{{ilink|Precision Minotaur Laser|Precision Minotaur Laser}} |
||
| − | |Ability to harvest tough minerals / +20% Mining Laser Power |
||
| − | |- |
||
| − | |style="background:#01325C;border:none" rowspan="1" | |
||
| − | |{{ilink|Minotaur Cannon}} |
||
| − | |Lobs explosives toward targets |
||
| − | |- |
||
| − | | |
||
| − | |{{ilink|Minotaur Bore|Minotaur Bore}} |
||
| − | |Terrain Manipulator for the Minotaur |
||
| − | |- |
||
| − | | |
||
| − | |{{ilink|Minotaur Radar Array}} |
||
| − | |Scans for nearby minerals & buildings |
||
| − | |- |
||
| − | | |
||
| − | |{{ilink|Environment Control Unit|Environment Control Unit}} |
||
| − | |Protects against all hostile environments |
||
| − | |} |
||
| − | |||
| − | ==== Upgrade Modules ==== |
||
| − | {| class="wikitable" |
||
| − | ! rowspan="2" | |
||
| − | ! rowspan="2" |Module Name |
||
| − | ! rowspan="2" |Stats |
||
| − | Drawn |
||
| − | ! rowspan="2" |''Module Improves'' |
||
| − | ! colspan="2" |[[File:CLASS.C.png|30px|link=]] |
||
| − | ! colspan="2" |[[File:CLASS.B.png|30px|link=]] |
||
| − | ! colspan="2" |[[File:CLASS.A.png|30px|link=]] |
||
| − | ! colspan="2" |[[File:CLASS.S.png|30px|link=]] |
||
| − | |- |
||
| − | !Min |
||
| − | !Max |
||
| − | !Min |
||
| − | !Max |
||
| − | !Min |
||
| − | !Max |
||
| − | !Min |
||
| − | !Max |
||
| − | |- |
||
| − | |style="background:#195771;border:none" rowspan="2" | |
||
| − | | rowspan="2" |{{ilink|Minotaur Engine Upgrade|Engine}} |
||
| − | | rowspan="2" |B 1 |
||
| − | A 1-2 |
||
| − | |||
| − | S 2 |
||
| − | |''Boost Tank Size'' |
||
| − | | colspan="2" rowspan="2" |n/a |
||
| − | |10 |
||
| − | |15 |
||
| − | |15 |
||
| − | |25 |
||
| − | |25 |
||
| − | |30 |
||
| − | |- |
||
| − | |''Fuel Usage'' |
||
| − | |5 |
||
| − | | 10 |
||
| − | |10 |
||
| − | |15 |
||
| − | |15 |
||
| − | |20 |
||
| − | |- |
||
| − | |style="background:#3399ff;border:none" rowspan="2" | |
||
| − | | rowspan="2" |{{ilink|Minotaur Laser Upgrade|Laser}} |
||
| − | | rowspan="2" |B 1-2 |
||
| − | A 1-2 |
||
| − | |||
| − | S 2 |
||
| − | |''Laser Power'' |
||
| − | | colspan="2" rowspan="2" | n/a |
||
| − | |10 |
||
| − | |20 |
||
| − | | 20 |
||
| − | |30 |
||
| − | |30 |
||
| − | |40 |
||
| − | |- |
||
| − | |''Laser Efficiency'' |
||
| − | |5 (95) |
||
| − | |10 (90) |
||
| − | |10 (90) |
||
| − | |15 (85) |
||
| − | |15 (85) |
||
| − | |20 (80) |
||
| − | |- |
||
| − | |style="background:#01325C;border:none" rowspan="3" | |
||
| − | | rowspan="3" |{{ilink|Minotaur Cannon Upgrade|Cannon}} |
||
| − | | rowspan="3" |B 2-3 |
||
| − | A 3 |
||
| − | |||
| − | S 3 |
||
| − | |''Damage'' |
||
| − | | colspan="2" rowspan="3" |n/a |
||
| − | |10 |
||
| − | |20 |
||
| − | |20 |
||
| − | |30 |
||
| − | |30 |
||
| − | |40 |
||
| − | |- |
||
| − | |''Rate Of Fire'' |
||
| − | |5 |
||
| − | |10 |
||
| − | |10 |
||
| − | |15 |
||
| − | |15 |
||
| − | |20 |
||
| − | |- |
||
| − | |''Weapon Efficiency'' |
||
| − | |5 |
||
| − | |10 |
||
| − | |10 |
||
| − | |15 |
||
| − | |15 |
||
| − | |20 |
||
| − | |} |
||
| − | Please add new modules directly to {{link|Minotaur Engine Upgrade}}; {{link|Minotaur Laser Upgrade}}; {{link|Minotaur Cannon Upgrade}}. |
||
| − | |||
| − | === [[Exocraft#Nautilon|Exocraft - Nautilon]] === |
||
| − | |||
| − | ==== Technology Blueprints ==== |
||
| − | {| class="wikitable" |
||
| − | ! colspan="3" |Info & pictures provided by Craig Mark of [https://www.facebook.com/groups/NMSResources facebook.com/groups/NMSResources] |
||
| − | |- |
||
| − | ! |
||
| − | !Technology / Upgrade |
||
| − | !Effect |
||
| − | |- |
||
| − | |style="background:#195771;border:none" rowspan="2" | <br><br> |
||
| − | [[File:CLASS.C.png|30px|link=]] |
||
| − | |{{ilink|Humboldt Drive|'''Humboldt Drive'''}} |
||
| − | |A thermally-efficient, inversion-proof reactor engine |
||
| − | |- |
||
| − | |{{ilink|Osmotic Generator|'''Osmotic Generator'''}} |
||
| − | |Fuel Efficiency +20% |
||
| − | |- |
||
| − | | |
||
| − | |'''{{ilink|Tethys Beam}}''' |
||
| − | |Submarine Mining Laser |
||
| − | |- |
||
| − | |style="background:#01325C;border:none" rowspan="1" | |
||
| − | |'''{{ilink|Nautilon Cannon}}''' |
||
| − | |Lobs explosive projectiles |
||
| − | |- |
||
| − | | |
||
| − | |'''{{ilink|High-Power Sonar|High Power Sonar}}''' |
||
| − | |Scans for nearby minerals & points of interest |
||
| − | |} |
||
| − | |||
| − | ==== Upgrade Modules ==== |
||
| − | {| class="wikitable" |
||
| − | ! rowspan="2" | |
||
| − | ! rowspan="2" |'''Module Name''' |
||
| − | ! rowspan="2" |'''Stats''' |
||
| − | '''Drawn''' |
||
| − | ! rowspan="2" |''Module Improves'' |
||
| − | ! colspan="2" |[[File:CLASS.C.png|30px|link=]] |
||
| − | ! colspan="2" |[[File:CLASS.B.png|30px|link=]] |
||
| − | ! colspan="2" |[[File:CLASS.A.png|30px|link=]] |
||
| − | ! colspan="2" |[[File:CLASS.S.png|30px|link=]] |
||
| − | |- |
||
| − | !'''Min''' |
||
| − | !'''Max''' |
||
| − | !'''Min''' |
||
| − | !'''Max''' |
||
| − | !'''Min''' |
||
| − | !'''Max''' |
||
| − | !'''Min''' |
||
| − | !'''Max''' |
||
| − | |- |
||
| − | |style="background:#195771;border:none" rowspan="3" | |
||
| − | | rowspan="3" |{{ilink|Humboldt Drive Upgrade|Humboldt Drive}} |
||
| − | | rowspan="3" |C 1 |
||
| − | B 1-2 |
||
| − | |||
| − | A 2-3 |
||
| − | |||
| − | S 3 |
||
| − | |Top Speed |
||
| − | |1 |
||
| − | |3 |
||
| − | |3 |
||
| − | |8 |
||
| − | |8 |
||
| − | |15 |
||
| − | |10 |
||
| − | |15 |
||
| − | |- |
||
| − | |''Fuel Usage'' |
||
| − | |1 |
||
| − | |5 |
||
| − | |5 |
||
| − | |10 |
||
| − | |10 |
||
| − | |15 |
||
| − | |15 |
||
| − | |20 |
||
| − | |- |
||
| − | |''Acceleration'' |
||
| − | |10 |
||
| − | |20 |
||
| − | |20 |
||
| − | |35 |
||
| − | |35 |
||
| − | |55 |
||
| − | |55 |
||
| − | |70 |
||
| − | |- |
||
| − | |style="background:#01325C;border:none" rowspan="2" | |
||
| − | | rowspan="2" |{{ilink|Nautilon Cannon Upgrade|Cannon}} |
||
| − | (Damage Stats don't <br> appear as they should) |
||
| − | | rowspan="2" |C 1 |
||
| − | B/A 1-2 |
||
| − | |||
| − | S 2 |
||
| − | |''Damage'' |
||
| − | |5 |
||
| − | |10 |
||
| − | |10 |
||
| − | |20 |
||
| − | |20 |
||
| − | |30 |
||
| − | |30 (13) |
||
| − | |40 (18) |
||
| − | |- |
||
| − | |''Rate Of Fire'' |
||
| − | |1 |
||
| − | |5 |
||
| − | |5 |
||
| − | |10 |
||
| − | |10 |
||
| − | |15 |
||
| − | |15 |
||
| − | |20 |
||
| − | |}'''Please add new modules directly to''' {{link|Humboldt Drive Upgrade}}; {{link|Nautilon Cannon Upgrade}}; |
||
| − | |||
| − | ===[[Freighter]]=== |
||
| − | |||
| − | ==== Technology Blueprints ==== |
||
| − | {| class="wikitable" |
||
| − | |- |
||
| − | ! |
||
| − | !Technology / Upgrade |
||
| − | ! colspan="2" |'''Effect''' |
||
| − | |- |
||
| − | |style="background:#3399ff;border:none" rowspan="7" | |
||
| − | |||
| − | |||
| − | [[File:CLASS.C.png|30px|link=]] |
||
| − | |||
| − | [[File:CLASS.B.png|30px|link=]] |
||
| − | |||
| − | [[File:CLASS.A.png|30px|link=]] |
||
| − | |||
| − | [[File:CLASS.C.png|30px|link=]] |
||
| − | |||
| − | [[File:CLASS.B.png|30px|link=]] |
||
| − | |||
| − | [[File:CLASS.A.png|30px|link=]] |
||
| − | |'''{{ilink|Freighter Hyperdrive}}''' |
||
| − | | +100 ly |
||
| − | |Travel to Yellow Systems |
||
| − | |- |
||
| − | |'''{{ilink|Warp Core Resonator}}''' |
||
| − | | +200 ly |
||
| − | | |
||
| − | |- |
||
| − | |'''{{ilink|Plasmatic Warp Injector}}''' |
||
| − | | +300 ly |
||
| − | | |
||
| − | |- |
||
| − | |'''{{ilink|Reality De-threader}}''' |
||
| − | | +800 ly |
||
| − | | |
||
| − | |- |
||
| − | |'''{{ilink|Amplified Warp Shielding}}''' |
||
| − | | +50 ly |
||
| − | |Travel to Yellow & Red Systems |
||
| − | |- |
||
| − | |'''{{ilink|Chromatic Warp Shielding}}''' |
||
| − | | +50 ly |
||
| − | |Travel to Yellow, Red & Green Systems |
||
| − | |- |
||
| − | |'''{{ilink|Temporal Warp Computer}}''' |
||
| − | | +50 ly |
||
| − | |Travel to Yellow, Red, Green & Blue Systems |
||
| − | |- |
||
| − | | |
||
| − | |'''{{ilink|Matter Beam}}''' |
||
| − | | colspan="2" |Send & receive products & substances to exosuit over a long distance |
||
| − | |} |
||
| − | |||
| − | ==== Upgrade Modules ==== |
||
| − | {| class="wikitable" |
||
| − | ! rowspan="2" | |
||
| − | ! rowspan="2" |'''Module''' |
||
| − | '''Name''' |
||
| − | ! rowspan="2" |'''Stats''' |
||
| − | '''Drawn''' |
||
| − | ! rowspan="2" |''Module'' |
||
| − | ''Improves'' |
||
| − | ! colspan="2" |[[File:CLASS.C.png|30px|link=]] |
||
| − | ! colspan="2" |[[File:CLASS.B.png|30px|link=]] |
||
| − | ! colspan="2" |[[File:CLASS.A.png|30px|link=]] |
||
| − | ! colspan="2" |[[File:CLASS.S.png|30px|link=]] |
||
| − | |- |
||
| − | !'''Min''' |
||
| − | !'''Max''' |
||
| − | !'''Min''' |
||
| − | !'''Max''' |
||
| − | !'''Min''' |
||
| − | !'''Max''' |
||
| − | !'''Min''' |
||
| − | !'''Max''' |
||
| − | |- |
||
| − | |style="background:#3399ff;border:none" rowspan=1| |
||
| − | |{{ilink|Freighter Hyperdrive}} |
||
| − | |Always |
||
| − | |''Hyperdrive Range'' |
||
| − | |50 |
||
| − | |100 |
||
| − | |100 |
||
| − | |150 |
||
| − | |150 |
||
| − | |200 |
||
| − | |200 |
||
| − | |250 |
||
| − | |- |
||
| − | |style="background:#ffcc00;border:none" rowspan="6" | |
||
| − | |[[File:PROPERTY.PRIMARY.FUEL.PNG|28px|link=]]Fuel Unit |
||
| − | |Always |
||
| − | |''Fuel Efficiency'' |
||
| − | |2 |
||
| − | |5 |
||
| − | |6 |
||
| − | |10 |
||
| − | |11 |
||
| − | |15 |
||
| − | |16 |
||
| − | |20 |
||
| − | |- |
||
| − | |[[File:PROPERTY.PRIMARY.SPECIAL.PNG|28px|link=]]Beacon |
||
| − | |Always |
||
| − | |''Fleet Speed'' |
||
| − | |2 |
||
| − | |2 |
||
| − | |6 |
||
| − | |6 |
||
| − | |11 |
||
| − | |11 |
||
| − | |15 |
||
| − | |15 |
||
| − | |- |
||
| − | |[[File:PROPERTY.PRIMARY.COMBAT.PNG|28px|link=]]Combat Unit |
||
| − | |Always |
||
| − | |''Fleet Combat'' |
||
| − | |2 |
||
| − | |2 |
||
| − | |6 |
||
| − | |6 |
||
| − | |11 |
||
| − | |11 |
||
| − | |15 |
||
| − | |15 |
||
| − | |- |
||
| − | |[[File:PROPERTY.PRIMARY.EXPLORE.PNG|28px|link=]]Exploration Unit |
||
| − | |Always |
||
| − | |''Fleet Exploration'' |
||
| − | |2 |
||
| − | |2 |
||
| − | |6 |
||
| − | |6 |
||
| − | |11 |
||
| − | |11 |
||
| − | |15 |
||
| − | |15 |
||
| − | |- |
||
| − | |[[File:PROPERTY.PRIMARY.MINING.PNG|28px|link=]]Mining Unit |
||
| − | |Always |
||
| − | |''Fleet Mining'' |
||
| − | |2 |
||
| − | |2 |
||
| − | |6 |
||
| − | |6 |
||
| − | |11 |
||
| − | |11 |
||
| − | |15 |
||
| − | |15 |
||
| − | |- |
||
| − | |[[File:PROPERTY.PRIMARY.TRADING.PNG|28px|link=]]Trade Unit |
||
| − | |Always |
||
| − | |''Fleet Trade'' |
||
| − | |2 |
||
| − | |2 |
||
| − | |6 |
||
| − | |6 |
||
| − | |11 |
||
| − | |11 |
||
| − | |15 |
||
| − | |15 |
||
|} |
|} |
||
==Release history== |
==Release history== |
||
| − | |||
* [[NEXT]] - Added as a product. |
* [[NEXT]] - Added as a product. |
||
** Multi-tool modules have the same icon as [[Short Circuit]] and [[Tiny Motor]]. |
** Multi-tool modules have the same icon as [[Short Circuit]] and [[Tiny Motor]]. |
||
Revision as of 03:21, 13 April 2021
| The subject of this article is from the Origins update.
The information from this article is up-to-date as of 9 November, 2020. |
The information from this article is up-to-date as of 9 November, 2020.
| Upgrade Module | |
|---|---|
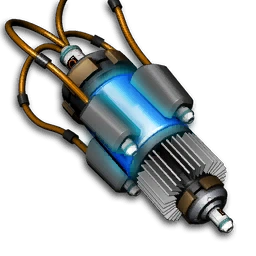
| |
| Category | Consumable |
| Type | Moderate (C) Significant (B) Powerful (A) Supreme (S) Suspicious (X) Upgrade |
| Updated | Origins |
Upgrade Modules are consumable products. These are important additions to base technologies and enhance them.
Summary
Upgrade Modules can greatly improve properties of the installed technologies in your exosuit, exocraft, multi-tool, or starship. These can be bought with nanites from technology merchants in space stations. Unwanted modules obtained from other sources (Damaged Machinery, Operations Centres, Crashed Ships, and so on) can be sold to these merchants for nanites to spend on more desirable modules. The prices vary between locations and it can be wise to buy an S-class module in a system offering a cheap supply due to its random property. At 400 nanite cost, 5% can mean around 20.
You will never be able to install all existing modules at the same time. Choose the ones that suit your play style and feel like the most fun for your character. With the right modules, you can be any combination of fast, resilient, and powerful. Technologies do not count as a module and their limit and thus can be used in combination with them.
Mechanics
Properties
Modules are one-off purchases. You can dismantle them and gain resources, but not reinstall them like technologies. Plan ahead and install modules of the same type next to each other, to benefit from the synergy bonus.
You can only install three of the same module family in each of the base inventory and the technology slots, amounting to a maximum module count of six (3+3) per family.
Upgrade Stat Generation
Upgrade modules follow a static progression during module installation, but the generation seed is used for all module families at the same time and changes during the installation of one for all of them. This means the name and stats of a specific upgrade changes whenever any other type of upgrade module is installed, whether it be Exosuit, Starship, or Multi-tool. The new module they change into correlates to their order of installation. The seed is static!
If the game is reloaded, the exact same pool will be offered to the player, no matter the order they install other modules. If an S-class module had 200 ly Hyperdrive Range bonus on the third installation no matter in what order the former modules are installed or their class, if the same S-class module is used third again, it will once again be the 200 ly bonus module even if the name changes. Only if used second or fourth will it change! This is independent of overall mods and stat bonuses currently installed in your inventory. The module pool remains static at all times!
Dismantling a module does not affect the module pool. It will not be rerolled. This guarantees the exact same item when purchased afterwards and can be used to dismantle a lesser module before installing a new one to keep the old synergy after reload.
Quality
Each module exists in the standard class order, C < B < A < S. (Only Suspicious Modules inherit the black-market X class.)
- C-class modules, valued at ~65 nanites, often contain upgrades with bad stats. For module types with at least four possible stats, upgrades from these modules will usually have one stat.
- B-class modules, valued at ~150 nanites, often contain upgrades with mediocre stats. For module types with at least four possible stats, upgrades from these modules will usually have two stats.
- A-class modules, valued at ~300 nanites, often contain upgrades with good stats. For module types with at least four possible stats, upgrades from these modules will usually have three stats.
- S-class modules, valued at ~500 nanites, often contain upgrades with very good stats. For module types with at least four possible stats, upgrades from these modules will usually have four stats.
Technology merchants always sell C-class (or B-class, for Exosuit/Exocraft module types lacking a C-class quality) modules for each module type. They also stock a random assortment of higher-class standard upgrade modules which varies between star systems.
If the player is unlucky, their new A-class module can be worse than their old C-class module, especially for those having only one stat (Starship Shield etc.) due to the low % ranges overlapping the top-tier of lower classes.
Names
Names are generated by adding random Prefix (adjective) and Suffix (subsystem name), and have no direct effect on module stats. You can have 2 module with the same name but very different stats depending on the order of installation.
Values
No Man's Sky uses a decimal system that always rounds down. So while there might be a hidden 0.1 to 0.9999 in any maximum value of any module, a true 90% can never be reached. Thus all numbers below that are like 89% are all rounded down by the game but effectively are part of the maximum. This does not go for 1/3 which is shown as 33% as 33.333% is still rounded down to 33%. The player notices no difference for absolute non-linear values and numbers based on fractions.
How to Install Modules
Press ![]() /
/![]() /
/![]() (PS4/PC/Xbox) on a module and click on a General or Technology slot to install it. Installing them in general slots comes at the expense of inventory space. For example one can install three movement modules in general slots and three more movement modules in the technology slots and have their cumulative bonus.
(PS4/PC/Xbox) on a module and click on a General or Technology slot to install it. Installing them in general slots comes at the expense of inventory space. For example one can install three movement modules in general slots and three more movement modules in the technology slots and have their cumulative bonus.
Tips
When you buy a high-grade module, create a restore point (e.g. get in and out of your starship), then install the module. If it is worse than your bonus target (see bonus stats on the module family pages), reload the game and buy a cheap C-class module. Install it and dismantle it immediately. Your module pool now is rerolled and the former useless item might be useful now. Then repeat the above procedure until you get module stats you are happy with. This way you can prevent wasting huge amounts of nanites by sacrificing low grade modules. Just remember that the module order is static, so reloading to change it won't work. The installation order has to be mixed up.
Technology Blueprint & Upgrade Module
Technology blueprints and upgrade modules are documented on each technology specific page as follows.
| Technology | Section |
|---|---|
| Exosuit | |
| Starship | |
| Living Ship | |
| Multi-Tool | See: Multi-tool
|
| Exocraft | See: Exocraft See: Minotaur See: Nautilon
|
| Freighter | See: Freighter
|
Release history
- NEXT - Added as a product.
- Multi-tool modules have the same icon as Short Circuit and Tiny Motor.
- Starship modules have the same icon as Cooling System and Quantum Accelerator.
- Shield and hazard protection Exosuit modules have the same icon as Master Circuit, Navigation Data and Quantum Processor.
- NEXT 1.63 - Exocraft modules added. They can be purchased from the Exocraft Technician once their mission chain has been completed.